
[Updated on Feb 16, 2011: Updated final baking time, see below
After making over 10 lb of bak kwa this past CNY, and having a chance to bake it at a friend's apartment as well, I had some enlightenment and realized that a couple more tips are in order as well as a slight change in baking time might yield better results. The updates are all in light plum color and in italics. ]
Darling hubby and I proudly love our bak kwa. Bak Kwa, Bak Kua, Chinese BBQ Pork, Chinese Pork Jerky, Yoke Gone, Rou Gan, Lung Yuk... Regardless of what you call it, its fragrance and flavor is addictive. Its slightly sweet, slightly salty, moist yet chewy texture is nicely complemented by the addition of Chinese Rose Cooking Wine, 玫瑰露 (Mei Gui Lu or Mei Kuei Lu).

It has always been a luxury item. At least it has always been so for me. Although the ingredients are simple, the traditional process of making this delicacy is long and arduous. My mom made it once when I was quite young. I remembered helping her take it out to sun-dry, and retrieving it before it rains or when the sun sets. Okay okay, grandma did most of that. For days, this continued, until finally, she dragged out the charcoal and started BBQ-ing it. Oh, it smelled heavenly! Did I mention that she spent hours bbq-ing the batch?
Years after that, being in the States, bak kwa is hard to come by. If you are lucky enough to find it in the Asian grocery store, be prepared to pay a high price for a few slices. Being me, I did not have the heart to spend my hard earned money on just a few slices of this. Thus, many of my day dreams consisted of bak kwa.
It wasn't until recently that a friend told me of a simple recipe that does not include days of sun-drying and hours of barbequeing. Wooohoo! The madness begins... I made a few alterations from the original recipe(s) though.
Tips:
1- The original recipe calls for cooking wine, but I remembered my mom using Mei Gui Lu. It was that distinctive flavor of this particular chinese cooking wine that made the pork taste and smell so good. So if you can find Mei Gui Lu, by all means, use it. Otherwise, you can also substitute with any chinese cooking wine you have.
2- The original recipe called for plastic sheets or cling wrap to roll or press the meat down into a thin layer. But I find using a spoon to do it was just as easy, less of a waste, and less things to clean. (a big YES from me)
3- The original recipe used a pair of chopsticks to stir, but hey, I just used a spoon, it works too. Again, less things to wash. Yay!
4- Both Little Corner of Mine and Tazz in the Kitchen insisted that aluminum foils not be used because the meat will stick to it. I followed the words of the wise, and so, no aluminum foils :)
5- Where I live, the weather is rather dry, and this dries out the cooked meat pretty quickly. So an airtight container or cling wraps are helpful here.
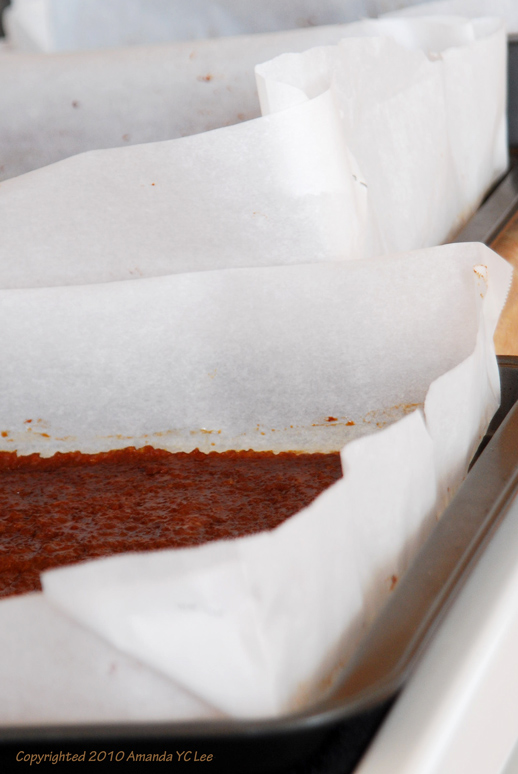
6- My first batch dirtied my oven like nothing else did. It bubbled over. So for the rest of the batches, I used a slightly larger sheet of parchment paper and stapled the corners up. This seemed to work really well so far.7- Depending on your oven, you might need slightly different baking time, do adjust slightly if you need to.
8- Try baking the trays in the middle of the oven, in one layer. If that is not possible, do watch the trays, and switch the upper and lower trays around during the last 7 minutes of baking so that they brown more evenly.
9- If you managed to procure minced meat with more fat content, do omit or reduce the amount of oil used. The minced meat I find at my local stores are rather lean, that was why I added oil to up the oil content.
Bak Kwa (Adapted from Little Corner of Mine and Tazz in the Kitchen)

1 lb. minced pork
1-1/2 tbsp fish sauce
1 tbsp dark soy sauce
1 tbsp light soy sauce
1 tbsp Chinese rose cooking wine (Mei Gui Lu)
1/2 cup sugar
1 tbsp dark soy sauce
1 tbsp light soy sauce
1 tbsp Chinese rose cooking wine (Mei Gui Lu)
1/2 cup sugar
1 tbsp oil
Line two medium sized baking sheet with parchment papers.
Place all ingredients in a big mixing bowl.
Stir with a spoon or pair of chopstick in one direction until gluey or well mixed.
Preheat oven to 255°F (125°C).
Spoon half of the meat mixture into each baking sheet.
Using the spoon, gently press on the meat until it is consistently about 1/8-inch thick.
Bake for 20 minutes.
Switch the oven temperature up to 355°F (180°C).
Continue to bake for about 15 minutes.
Retrieve the trays from the oven, and with the help of a pair of scissors and tongs, cut the meat from each tray into 6-8 pieces.
Flip the meat over (so that it bakes more evenly on both sides) and bake for another 10 minutes.
Remove trays from the oven and cool slightly, then immediately store in an airtight container or cover with clingwrap.
[Update:
While the oven is heating up to 355°F (180°C), proceed to cut the meat to the size you prefer, and flip it over so that the initial side that was facing upwards (rough side), is now facing down.
When the oven has reached 355°F (180°C), bake for about 8 minutes.
Then retrieve and flip it so that the rough side is now facing upwards.
Continue to bake for another 7 minutes or so, watching the batch for the last 3-4 minutes.
Remove trays from the oven and cool slightly, then immediately store in an airtight container or cover with clingwrap.]

Enjoy and hopefully this saves you tons of money!! And if you tried making it and made any alterations that you love, I'd love to hear from you. :)
Thank you, thank you, thank you Amanda! Your bak kwa was the best I ever had! :-D It was so good, now I crave more...
ReplyDeleteReally simple and delicious right? I also used spoon to press it down these days, getting lazier. Going to make some for the coming CNY for sure. Can u believe it, CNY is just less than a month away. It approaching a bit too soon as I have no mood to start baking any CNY cookies yet.
ReplyDeleteJim: Thank you for the high praise. heehee... You can make another batch with this recipe now though ;)
ReplyDeleteChing: Yup yup yup! CNY... tell me about it, I haven't started mine yet, and it's only 2 weeks to go :P Good luck to us! hahaha
Amanda -
DeleteBeautiful picture at top. I would like permission to use it for business purposes. Could you email me at fareastjerkytreats711@ gmail.com? Than you. Cindy
Oh yes, I totally agree that Mei Gwei Lou makes it much much better.
ReplyDeleteI use it for my char siu too.
I love bakwa and yours looks very authentic! Delicious!
ReplyDeleteHiya Amanda,
ReplyDeleteThanks for sharing the Bak Kwa recipe.
Your Bak Kwa looks so juicy and so yummy. I love Bak Kwa and love the way you explained with the pictures. Greased paper certainly a good idea.
I have not eaten Bak Kwa for ages. Every time we go back to KL, we barely have room for it.
With your recipe I will definitely make it for my husband and our 2 little girls.
TA & God Bless
Cheers,
Simone
Wendy: I'll keep it in mind when I'm making char siu next time :D Thanks for the tips!!
ReplyDeleteJeannie: thank you :)
Simone: Do let me know if you try it out and good luck! ^.^
thx for the recipe! it's really yummee!
ReplyDeletekaka.C: I'm glad you're enjoying it :) I'm enjoying lots of it this CNY! I have to keep remembering to drink lots of water though :P lol
ReplyDeleteHi, thanks for sharing with us. This is such a good recipe!!! May I know did you turned on Fan-Force for the oven?
ReplyDeleteHello Angeline, my pleasure to share it with everyone ^.^ To answer your question, no I didn't turn on "fan-force", because mine isn't a convection oven. If you have your fan turned on, you might need to shorten the baking time. So, maybe check it at 5-7 minutes then turn it over.
ReplyDeleteThanks Amanda. I was looking for the recipe and there are so many out there. But I see that your is simple and you have lots of tips too. We live in Phoenix, Arizona and looking for the Rose wine is a challenge, I managed to find it at the Asian supermarket, but its says salty on it, so was hesitant to get it. Will get it anyway to try with your recipe. Will have a go at it this weekend.
ReplyDeleteHi Razorback88, sorry for the rather late reply. I haven't been blogging for a while due to major changes in my life for the past two years or so. I used to live in Phoenix area too, and I think you should be able to find rose wine in Lee Lee or Ranch 99 (I'm not sure what the new name is now :D ). Good luck! Let me know how it goes :)
Delete