Friday, January 14, 2011

Cranberry Sauce and Swedish Meatballs


We don't have cable TV at home.  Yup, we only watched four out of over 50 channels:   Discovery Channel, Food Channel, History Channel, and National Geographic Channel.  On top of that, the only time we watch TV is probably around meal time.  So we've cut off cable service.  Since then, PBS and Create are almost permanently on our TV when its on.  Well, except when we're watching our favorite dramas at night or during World Cup season.  hehe...  Anyway, when I was tuning in to Create one morning, I saw this lady making Swedish meatballs.  My mind instantly skidded to a halt in front of the blue and yellow building of Ikea.  Sadly, there are no Ikeas in Colorado, but not for long though.... heeeeh!  A new Ikea is coming to town this fall.  Yay!

Now, I haven't had Swedish meatballs for quite a while now, and was just missing it quite a bit.  The show must have read my mind.  Seriously!  Although, I must say that as I was getting ready to jot down the ingredients they used, I realized that the ingredients were (to me) "some" this and "a little" that.  I gave up trying to write anything down, and went online instead to look up some recipes.  I did finish watching the show to learn the basic process and techniques used for the dish.  After comparing some online recipes, I decided on Scandinavian Cooking's recipe.

Now, the other dilemma I had, was the sauce.  I like pairing the meatballs with lingonberry sauce.  Again, sadly, no Ikea, thus no lingonberry sauce.  sigh...  I was almost giving up and going to make a brown sauce for it instead, when Eureka!  Cranberries!  Cranberries went on sale after new year and I got a bag of it sitting in my fridge.  Gave myself a little imaginary pat on the back, and went straight to the kitchen, feeling pretty happy with myself.  Maybe even humming a happy little tune on the way down the staircase...

Tips:
1- You can either choose to pan fry it or oven bake the meatballs.  According to Scandinavian Cooking's article, pan frying will give you a "better result".  I baked them this time, and it came out pretty alright.
2- If you are baking, remember to adjust your baking time to complement your meatball size.  I made two batches, the first batch was about 1-1/4" in diameter and the second batch was smaller at about 3/4" diameter.  The first batch came out okay at about 13 minutes in the oven.  While the second batch, came out too dry because I forgot to readjust the baking time.
3- If you made too much, just freeze them up and save them in airtight containers or ziplock bags.  Heat up the meatballs when you need some Scandinavian Cooking suggests that the meatballs be reheated for 10-15 minutes at 375°F "in a single layer on an ungreased rimmed baking sheet".
4- Certain recipes will call for a mix of beef, pork, and/or veal.  You can decide on the types of mixture you prefer.  However, this meatball recipe is supposed to be quite tender.  So I would suggest trying to avoid using meats that are too lean.  
5- Using fresh bread as filler gives a pretty good result, so if you have some fresh breads, use those if you have them, otherwise, bread crumbs, flour, or mashed potatoes works too.
6- When baking, use a baking tray with rims, not baking sheets, because there will be some liquid bubbling out during the baking process.
6- If you're making them at the same time, start with the cranberry sauce, and while it's simmering and cooling down, make the meatballs.


Swedish Meatballs (slightly adapted from this recipe)

1lb minced meat (pork, beef, and/or veal)
1 egg
1/2 cup half and half (milk, cream, or water is also fine)
1 cup torn bread or mashed potatoes, or 1/2 cup bread crumbs or all purpose flour
pinch of salt and pepper to taste
1/2 onion, finely minced
mustard to taste (about 1/8 tsp)

Mix all ingredients together until well-mixed, then form into balls of about 1-1/2 inch diameter.
Pan fry over medium high heat in a little oil until browned on all sides.
Place the meatballs about 1 to 1-1/2 inch apart on parchment lined baking tray, and bake in 450°F oven for about 13 minutes.


Cranberry Sauce

1 bag  (12 oz) cranberries
1-3/4 cup sugar
1/3 cup water
1 cinnamon stick (~2 inches long)
1/4 tsp ground nutmeg
Rinds and juice from 1 orange
Combine all ingredients in a medium sauce pan.
Boil over medium high heat for about 2 minutes, stirring constantly.
Reduce heat to low, and simmer for about 10-15 minutes until thickened.
Remove from heat and cool on cooling rack.

Enjoy and hopefully you'll enjoy this recipe as much as I did ^.^

Thursday, January 6, 2011

Bak Kwa - Chinese BBQ Pork


[Updated on Feb 16, 2011:  Updated final baking time, see below
After making over 10 lb of bak kwa this past CNY, and having a chance to bake it at a friend's apartment as well, I had some enlightenment and realized that a couple more tips are in order as well as a slight change in baking time might yield better results.  The updates are all in light plum color and in italics. ]

Darling hubby and I proudly love our bak kwa.  Bak Kwa, Bak Kua, Chinese BBQ Pork, Chinese Pork Jerky, Yoke Gone, Rou Gan, Lung Yuk... Regardless of what you call it, its fragrance and flavor is addictive.  Its slightly sweet, slightly salty, moist yet chewy texture is nicely complemented by the addition of Chinese Rose Cooking Wine, 玫瑰露 (Mei Gui Lu or Mei Kuei Lu).


It has always been a luxury item.  At least it has always been so for me.  Although the ingredients are simple, the traditional process of making this delicacy is long and arduous.  My mom made it once when I was quite young.  I remembered helping her take it out to sun-dry, and retrieving it before it rains or when the sun sets.  Okay okay, grandma did most of that.  For days, this continued, until finally, she dragged out the charcoal and started BBQ-ing it.  Oh, it smelled heavenly!  Did I mention that she spent hours bbq-ing the batch?

Years after that, being in the States, bak kwa is hard to come by.  If you are lucky enough to find it in the Asian grocery store, be prepared to pay a high price for a few slices.  Being me, I did not have the heart to spend my hard earned money on just a few slices of this.  Thus, many of my day dreams consisted of bak kwa.

It wasn't until recently that a friend told me of a simple recipe that does not include days of sun-drying and hours of barbequeing.  Wooohoo!  The madness begins...  I made a few alterations from the original recipe(s) though.  


Tips:
1- The original recipe calls for cooking wine, but I remembered my mom using Mei Gui Lu.  It was that distinctive flavor of this particular chinese cooking wine that made the pork taste and smell so good.  So if you can find Mei Gui Lu, by all means, use it.  Otherwise, you can also substitute with any chinese cooking wine you have.
2- The original recipe called for plastic sheets or cling wrap to roll or press the meat down into a thin layer.  But I find using a spoon to do it was just as easy, less of a waste, and less things to clean.  (a big YES from me)
3- The original recipe used a pair of chopsticks to stir, but hey, I just used a spoon, it works too.  Again, less things to wash.  Yay!
4- Both Little Corner of Mine and Tazz in the Kitchen insisted that aluminum foils not be used because the meat will stick to it.  I followed the words of the wise, and so, no aluminum foils :)
5- Where I live, the weather is rather dry, and this dries out the cooked meat pretty quickly.  So an airtight container or cling wraps are helpful here.
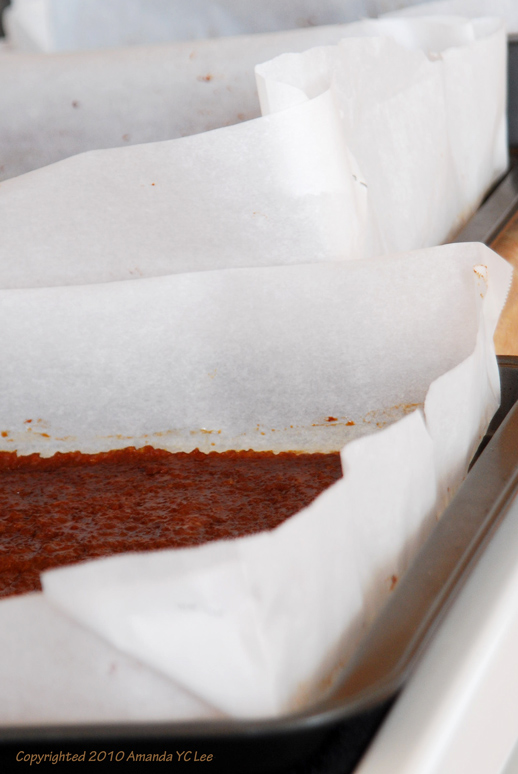
6- My first batch dirtied my oven like nothing else did.  It bubbled over.  So for the rest of the batches, I used a slightly larger sheet of parchment paper and stapled the corners up.  This seemed to work really well so far.
7- Depending on your oven, you might need slightly different baking time, do adjust slightly if you need to.
8- Try baking the trays in the middle of the oven, in one layer.  If that is not possible, do watch the trays, and switch the upper and lower trays around during the last 7 minutes of baking so that they brown more evenly.
9- If you managed to procure minced meat with more fat content, do omit or reduce the amount of oil used.  The minced meat I find at my local stores are rather lean, that was why I added oil to up the oil content.

Bak Kwa (Adapted from Little Corner of Mine and Tazz in the Kitchen)


1 lb. minced pork
1-1/2 tbsp fish sauce
1 tbsp dark soy sauce
1 tbsp light soy sauce
1 tbsp Chinese rose cooking wine (Mei Gui Lu)
1/2 cup sugar
1 tbsp oil

Line two medium sized baking sheet with parchment papers.
Place all ingredients in a big mixing bowl.
Stir with a spoon or pair of chopstick in one direction until gluey or well mixed.
Preheat oven to 255°F (125°C).
Spoon half of the meat mixture into each baking sheet.
Using the spoon, gently press on the meat until it is consistently about 1/8-inch thick.
Bake for 20 minutes.
Switch the oven temperature up to 355°F (180°C).
Continue to bake for about 15 minutes.
Retrieve the trays from the oven, and with the help of a pair of scissors and tongs, cut the meat from each tray into 6-8 pieces.
Flip the meat over (so that it bakes more evenly on both sides) and bake for another 10 minutes.
Remove trays from the oven and cool slightly, then immediately store in an airtight container or cover with clingwrap.
[Update:
While the oven is heating up to 355°F (180°C), proceed to cut the meat to the size you prefer, and flip it over so that the initial side that was facing upwards (rough side), is now facing down.
When the oven has reached 355°F (180°C), bake for about 8 minutes.
Then retrieve and flip it so that the rough side is now facing upwards.
Continue to bake for another 7 minutes or so, watching the batch for the last 3-4 minutes.
Remove trays from the oven and cool slightly, then immediately store in an airtight container or cover with clingwrap.]


Enjoy and hopefully this saves you tons of money!!  And if you tried making it and made any alterations that you love, I'd love to hear from you.  :)